
Check a patient in from an appointment or the top bar, then record the examination and complete the visit.
Each time a pet comes to the clinic, you open a visit for it with Patient Check-in.
Where to Start
Section titled “Where to Start”- New → Patient Check-in in the top bar. You choose the customer and pet yourself.
- Patient Check-in on an appointment. The customer is filled in from the appointment, and so is the pet if the appointment has one.
- Patient Check-in on a customer’s or pet’s record. That customer or pet is already chosen.
Check the Patient In
Section titled “Check the Patient In”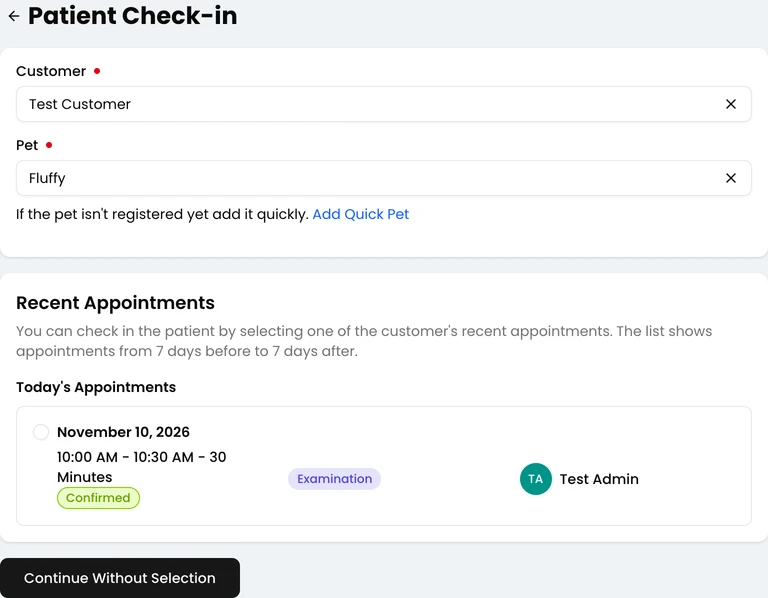
-
Choose the Customer and the Pet. For a pet that isn’t registered yet, use Add Quick Pet.
-
The customer’s appointments around today are listed under Recent Appointments, and their vaccinations under Recent Vaccinations. Select the one this visit is for and click Continue. If the visit isn’t for any of them, click Continue Without Selection.
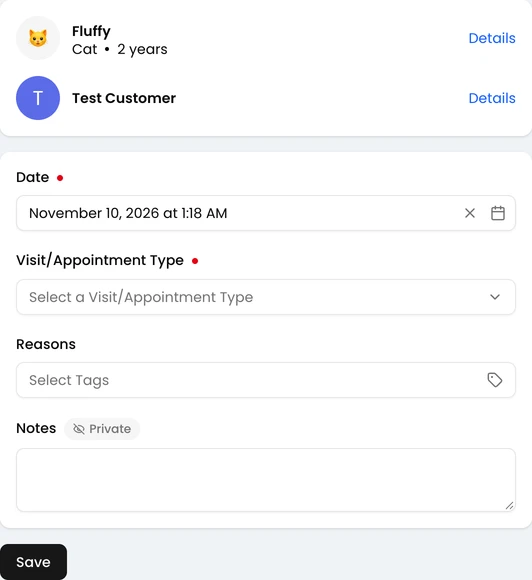
-
Check the Date and choose the Visit/Appointment Type.
-
Add Reasons or Notes if you need them. Notes are marked Private and aren’t shown to the customer.
-
Click Save. The visit opens.
If you checked in from an appointment, the appointment is marked Arrived. If you selected a vaccination, it’s marked as administered on the visit date.
A pet can have only one open visit. If one is already open, the page says so and offers Go to Visit and Complete Visit.
The Visit
Section titled “The Visit”
The visit opens on Examination. Treatments, the prescription and the invoice have their own tabs. Fill in only what this visit needs, in any order.
Examination
Section titled “Examination”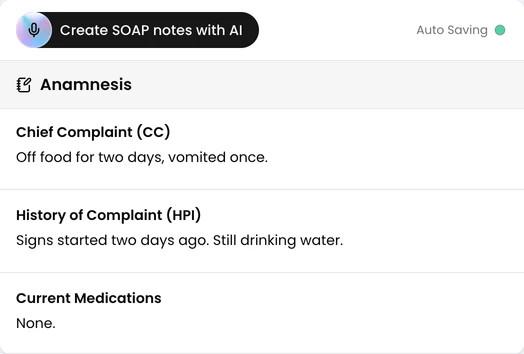
The examination has three parts:
- Anamnesis: Chief Complaint, History of Complaint and Current Medications.
- Vital Signs, Physical Exam and Lab Results.
- Assessment & Plan: Clinical Assessment, Diagnoses and Treatment Plan.
Notes are saved automatically when you click out of a field. Once the visit is Completed, they’re read-only.
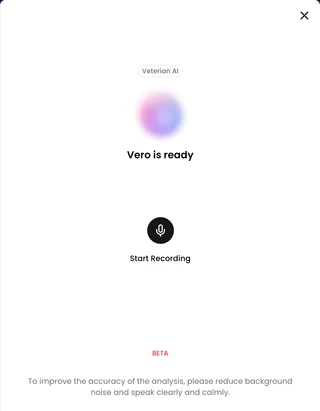
To dictate the examination instead of typing it, click Create SOAP notes with AI. The fields are filled in from your recording, and you check them before they’re saved. For the steps, see Create SOAP Notes with AI.
Visit Status
Section titled “Visit Status”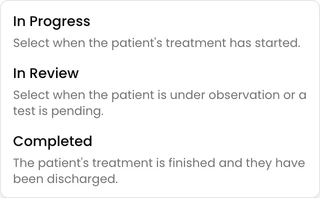
A new visit starts as Checked-in. Click the status button at the top right to change it to In Progress, In Review or Completed. Each option says when to use it.
If the invoice is still a draft when you complete the visit, you’re asked to confirm. The invoice stays open until you issue it.