
Write a prescription on a visit, issue it, then print it or send it to the customer by email.
You write a prescription on the visit’s Prescription & Follow-up tab. Once it’s issued, you can print it or send it to the customer.
Where to Start
Section titled “Where to Start”Open the visit and click the Prescription & Follow-up tab. To open a visit, see Record a Visit.
Add Medications
Section titled “Add Medications”-
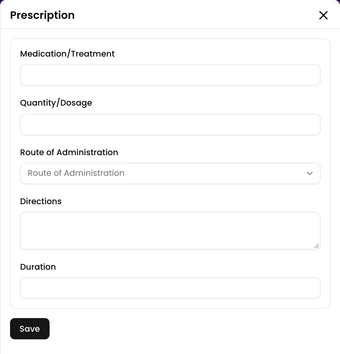
Click Add Medication/Treatment.
-
Fill in Medication/Treatment, Quantity/Dosage, Route of Administration and Directions. These four are required.
-
Add a Duration if you need one.
-
Click Save. The line is added to the prescription.
-
Repeat for each medication.
Below the list, write Instructions for the prescription. Note is marked Private and is for internal notes. Both are saved as you type.
To change or delete a line, use the pencil and trash buttons at the end of it.
Issue the Prescription
Section titled “Issue the Prescription”Click Issue Prescription and confirm. The prescription cannot be edited after it has been issued or sent to the customer.
After it’s issued, the prescription shows its Published Date.
Print or Send It
Section titled “Print or Send It”- To print, click the printer button next to Send to Customer. The button appears once the prescription is issued, and opens a preview to print from.
- To email it, click Send to Customer and confirm. The prescription is sent to the customer’s email address as a PDF. If the customer has no email address, the app shows No email address found for this customer.
The trash button at the bottom of the prescription deletes the whole prescription. It’s not available after the visit is Completed.
Follow-up
Section titled “Follow-up”Below the prescription, Add Follow-up Appointment opens a new appointment for the same customer and pet. See Create an Appointment.